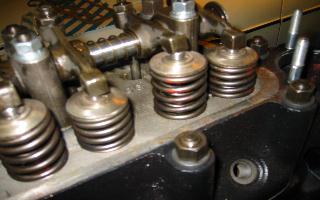
.... finally rotate the engine and check that all the valve springs have adequate gaps between the coils when the valves are fully open.
10. Fitting the head
|
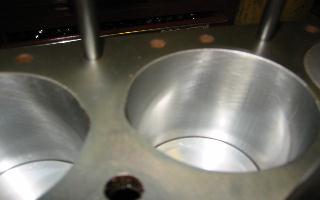
After fitting the studs, the top of the block is cleaned of grease and dirt and examined carefully for lifted threads round the studs ( if found then remove the stud and lightly countersink the hole) - note also that the bores are clean and you can see the 60 degree crosshatch of the honing clearly in this shot, you can also just see the cutout in the top of the bore for the exhaust valve...... |
|
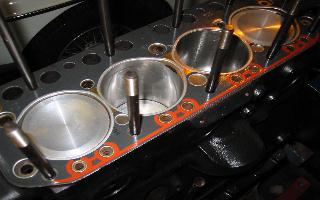
....... then fit the gasket, this one is a Payen gasket, note the black resin surface and the additional raised red coloured resin around the water passages which control the classic water leaks on these engines - also note the steel rings round the major water passages near the bores ....... |
|
..... lower the head gently onto the studs - mind you don't scratch the head surface in this operation ........ |
|
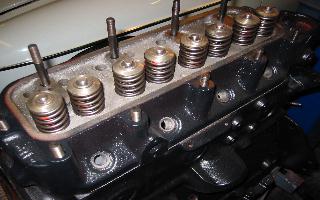
...... insert and tighten the 5/16 inch studs that hold the rocker posts - long ones on the outside, short ones in the centre........ |
|
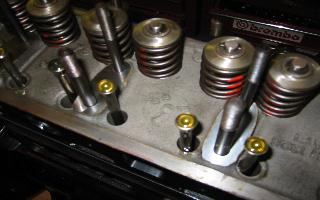
........ fit the steel shims to the centre pair of post studs, drop in the push rods and oil the tops - letting some oil dribble down into the tappets below.......... |
|
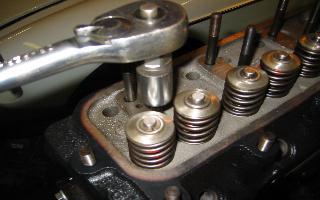
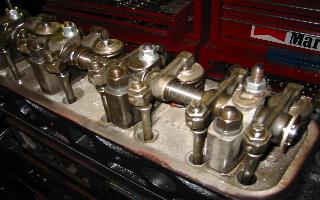
..... fit the rocker gear, head washers and nuts, remembering the special lockwasher on the rear rocker post, and torque down the head nuts to the specified figure - 50 ft lbs or 55 ft lbs if the studs have a dimple or 22 on the end - work out spirally from the centre stud on the spark plug side or follow the manual sequence...... |
|
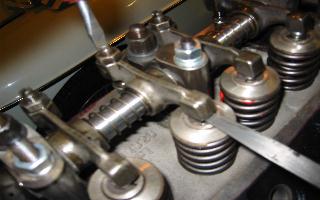
...... adjust the valve clearances using the rule of 9 - number one valve down, adjust number 8 valve, etc.... |
|
.... finally rotate the engine and check that all the valve springs have adequate gaps between the coils when the valves are fully open. |